https://vulkan-tutorial.com/en/Compute_Shader
튜토리얼 문서에서 마지막으로 extra-chaper로 compute shader를 다루고 끝이 난다.
Sascha Williems 라는 사람이 이 챕터를 작성했다고 해서, github repo를 찾아봤는데, 다양한 vulkan 예제 구현 repo가 있었다.
해당 코드를 받아서 여러 예제들을 실행시켜봤는데, 다음으로 공부할 방향을 이 레포와 같게 구현해나가면 좋겠다는 생각이 들어서 내 repo도 새로 정리하고, 예제들을 하나씩 구현해나가는 형태로 계획을 세웠다.
이 example repo에 대한 내용은 다음 글에서 계획과 추가한 예제마다 post를 하나씩 작성할 계획이다.
- Compute Shader
- additional readings
- 마무리
Compute Shader
Intro
vulkan에서는 필수적으로 compute shader를 지원하는데, 구 api들과의 차이점이다.
즉 고성능 desktop gpu든, 저전력 임베디드 장치이든 compute shader를 사용할 수 있다는 뜻이다.
GPGPU로서 전통적인 그래픽스 작업 뿐 아니라, 여러 계산이 활용될 수 있는 내용이다.
- image manipulation
- visibility test
- post processing
- lighting calculation
- animation
- physics
- headless compute
- number crunching. 숫자 계산 관련 작업
- AI
AI 관련 작업의 경우는 pytorch나 tensorflow, Caffe등 다른 여러 특화된 framework가 있어서 Vulkan compute shader를 쓸 일은 없지 않을까 싶다. Vulkan compute shader를 쓰는 장점은 Graphics 작업과 연계된 계산을 수행할 때, 별도의 데이터 변환이나 전송 작업 없이 작성할 수 있어서 성능과 구현 상 이점에 있지 않을까 싶다.
Advatages
compute shader를 쓰는 장점
- CPU의 workload를 분산한다.
- CPU memory에서 GPU memory로 data moving이 필요없다.
- 이 말은 예를 들어 물리 시뮬레이션의 결과를 graphics shader를 통해 렌더링하고 싶을때, CPU를 사용했다면 결과를 GPU로 옮겨줘야하는 작업이 필요하지만, GPU에서 계산되었다면 그런 단계가 필요 없다는 뜻으로 이해했다.
- GPU의 강력한 parallelized computing.
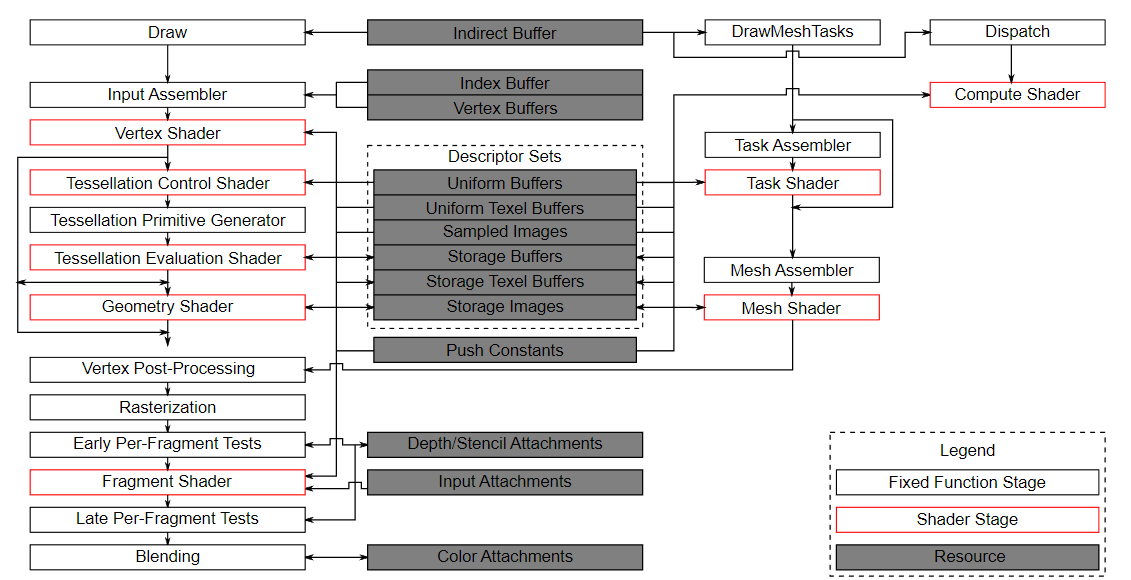
Vulkan pipeline
 |
|---|
| https://vulkan-tutorial.com/images/vulkan_pipeline_block_diagram.png |
우측의 compute shader stage는 기존 graphics pipeline stage에 포함되지 않는 것들인데, 중앙의 descriptor set들의 사용은 동일하게 할 수 있다.
example
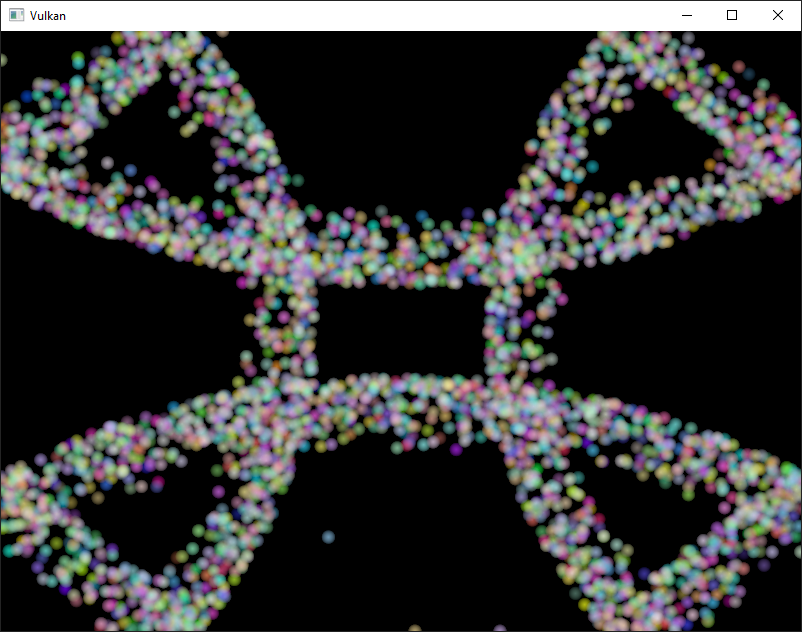
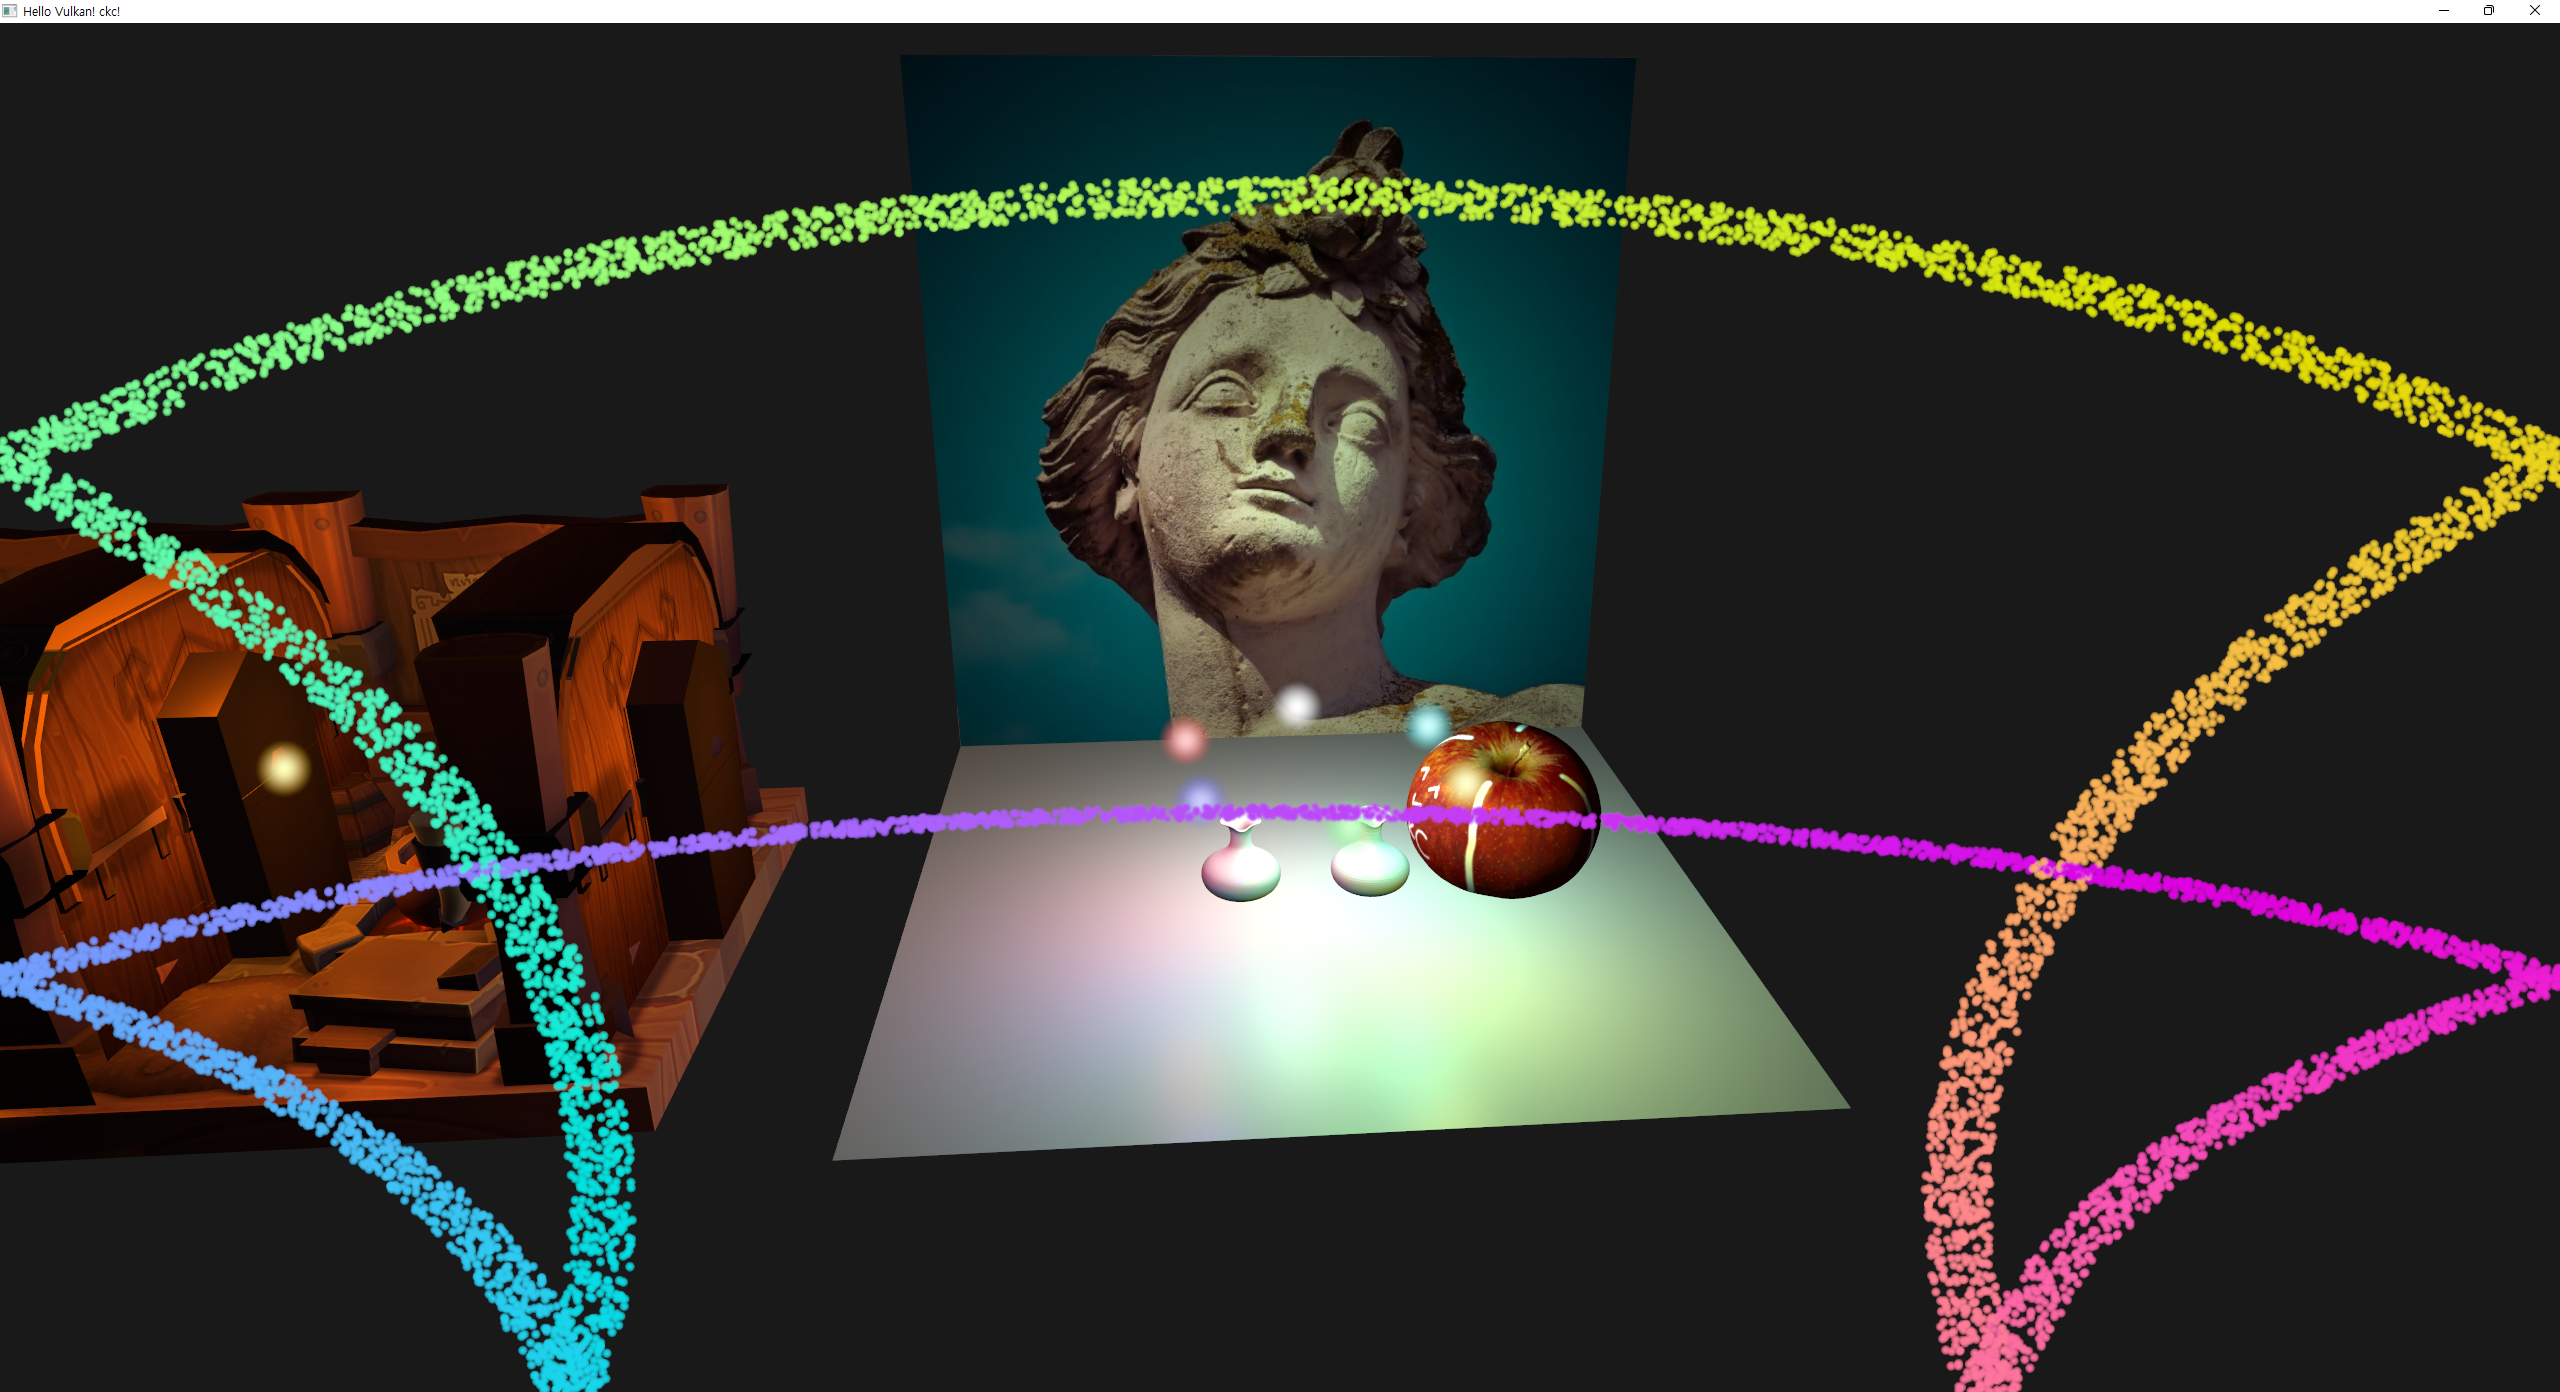
여기서 구현할 예제는 particle system이다.
- vertices -> vertex buffer
- update based on some equation.
classical한 cpu basd particle system에서는 host의 main memory에 particle data를 저장하고, cpu에서 업데이트 한다. 그 다음 vertices가 gpu의 memory로 전송된 다음 display된다. 결국 vertex buffer를 매 frame마다 새로 만들어주는 구조이고, 이 부분의 비용이 높다. 구현 방법에 따라서, gpu의 memory가 cpu에 의해 written 되게 하는 방식 (resizable BAR라고 하는 시스템을 쓰거나, integrated GPU의 unified memory를 쓰는 등)을 쓰거나 혹은 host local buffer를 써서(가장 느림) CPU가 particle을 update하는 우회방식을 써야한다.
GPU방식에서는, gpu에 처음 upload한 vertice를 가지고 compute shader를 통해 GPU memory상에서 바로 update할 수 있다. 이 방식이 빠른 원리는 GPU와 그 local memory의 bandwidth가 훨씬 크기 때문인데, PCI-E bandwidth와 main memory에 의해 CPU 기반에서는 제한되게 된다.
또한 particle을 update하고 rendering 하는게 병렬로 가능해지는데, 이를 asynch compute 라고하고 여기서는 다루지 않는다.
예제 구현 방향
| 이 tutorial에서의 예제 | 실제 구현된 예제 |
|---|---|
 |
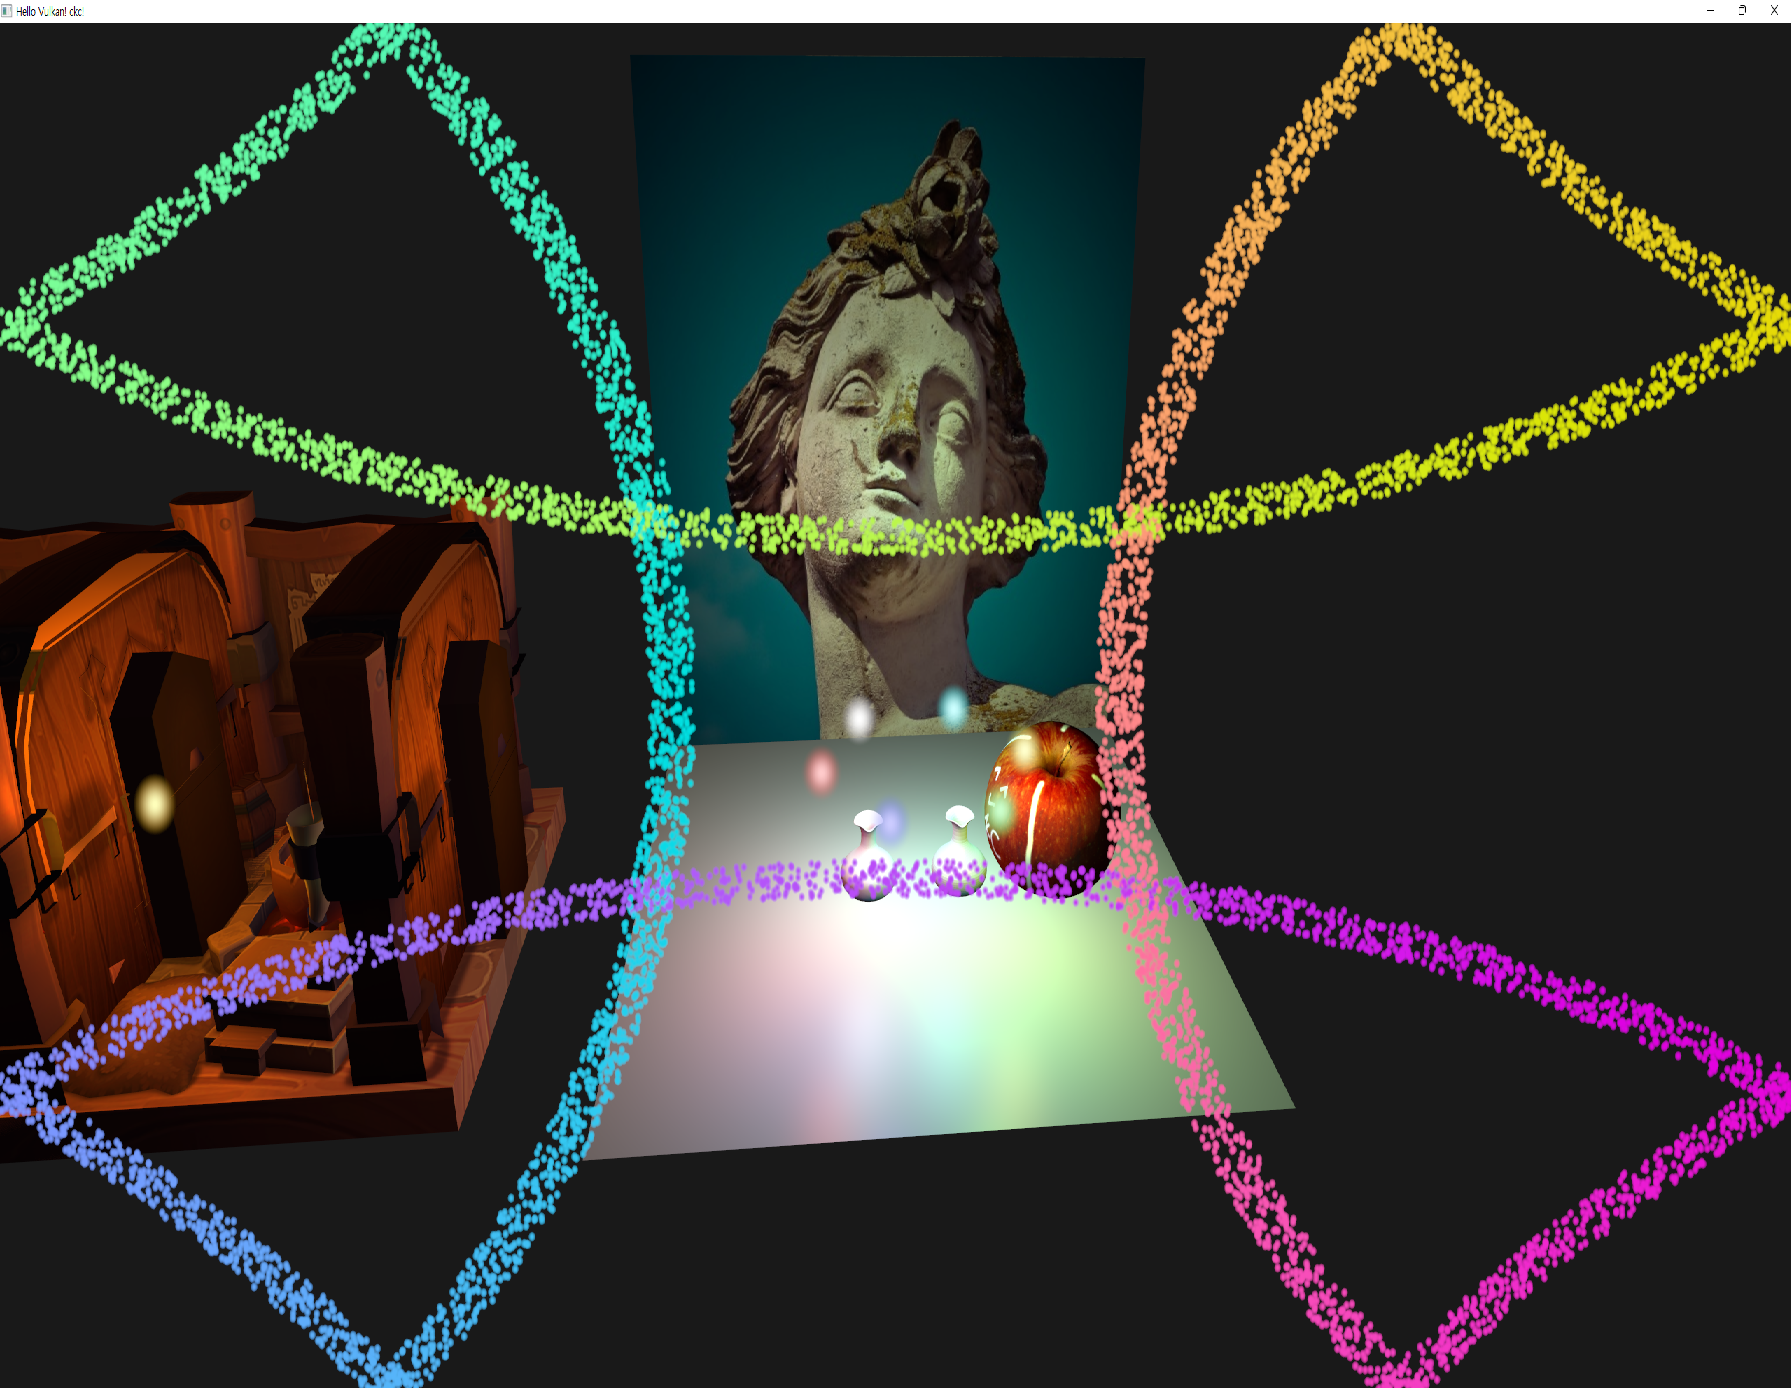 |
| https://vulkan-tutorial.com/images/compute_shader_particles.png | 실행한 예제 코드 |
차이점은 기존에 LVE와 tutorial 후반부에서 구현해놓은 내용들 위에 compute particle 내용을 추가했다는 점이다.
이 시점에서의 코드 구조와 구현할 계획들을 정리하면 다음과 같다.
- 현재 구조
- render system의 하위로 pipeline이 포함되어 있고, graphics pipeline만이 구현되어 있음. 이
- 이 pipeline은
renderGameObjects()내부에서 frameInfo의 command buffer와 함께 bind된다.
- 이 pipeline은
- renderer가 swapchain과 command buffer 자원을 가지고 있다.
- renderer에서 얻은 render pass로 render system이 pipeline을 생성함.
- descriptor set과 ubo는 app에서 선언되어 있다.
- seamphore와 fence는 swapChain 내부에 구현되어 있다.
- render system의 하위로 pipeline이 포함되어 있고, graphics pipeline만이 구현되어 있음. 이
- Requirements
- 기존 point light system과 simple render system의 기능을 유지한다.
- 추가할 particle compute system은 graphics와 compute pipeline을 둘다 소유한다.
- swapchain과 render pass는 공용.
- 어차피 submit, synchronization 관련은 swapchain image를 공유하기 때움.
- compute semaphore와 command buffer는 별도로 필요하다.
- command buffer와 ubo, descriptor set 등 자원이 compute 용도 별도로 필요하다.
- 구조
- renderer는 graphics, compute 공용으로 사용한다.
- swapchain - queue family index, sema, fence등. graphics 관련 자원들이 이미 들어있다.
- sema - graphics / compute
- cmd buffer - graphics / compute
- 여기서 submit 할때 synch관련 내용을 조정한다.
-
beginFrame()/endFrame()과 별도로 compute 과정 bigin/End for each frame이 필요하다.
- swapchain - queue family index, sema, fence등. graphics 관련 자원들이 이미 들어있다.
- system graphics - point light / simple / particle
- descriptorSets, layout (not global)
- pipeline, layout
- ubo (not global)
- system compute - particle
- 튜토리얼에서
recordComputeCommandBuffer에 해당하는 기능을 구현- bind 및 dispatch cmd recording
- computeDescriptorSets가 별도로 필요하고, 거기에 ubo 및 SSBO(shader storage buffer obejct) 관련 자원이 필요함.
- descriptorPool은 공용으로 쓰고, descriptorSetLayout은 별도로 사용.
- 이미 graphics 목적의 ubo와 object별 texture에 사용되는 자원들은 구현되어 있으므로 compute 관련 자원만 추가하면 됨.
- 튜토리얼에서
- 포함 관계 및 순서
- ssbo, ubo 생성
- descriptorSet 생성 (layout-allocate-write(buffer bind))
- graphics와 compute 분리
- pool생성시 타입(pooSize) 및 수(maxSets) 반영
- descriptorPool의 경우, 하나의 pool을 써야하는지에 대한 확실한 정답은 없다.
- https://www.khronos.org/blog/vk-ext-descriptor-buffer 에서 관련 글을 찾아봤다.
- 여러개를 쓰게 되면 memory 할당에 의한 overhead가 있다는 것 같고, over allocate의 위험이 증가하는 문제가 있다.
- 그렇다고 하나의 pool만 쓰자니 각 descriptor를 얼마나 쓸지 미리 정해야하는 어색함이 생긴다.
- 보통 쓰는 방법이 thread 별로 pool을 나눠쓰는 방식이라고 한다.
- pipeline 생성 (layout에 descriptor 정보가 필요함)
- compute & render 작성 (recording)
- shader module 작성
- comp shader 및 particle render shader
- pipeline 생성시 확인.
- 이후 renderer에서
beginFrame()/endFrame()을 확장해서 적절한 사이에 recording 파트를 넣고, submit도 추가 - synchronization 관련 발생 가능한 문제는 기존 코드에 추가해서 swapchain에서 전부 해결
- renderer는 graphics, compute 공용으로 사용한다.
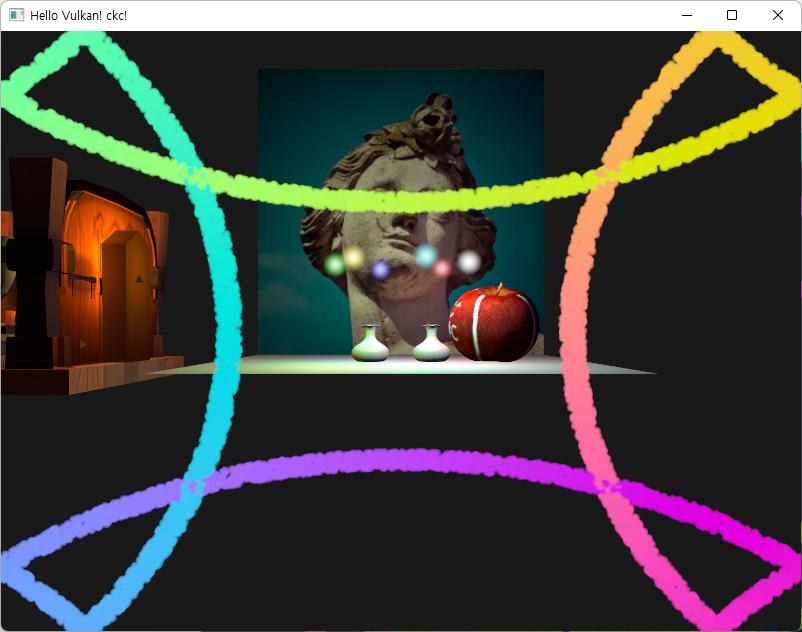
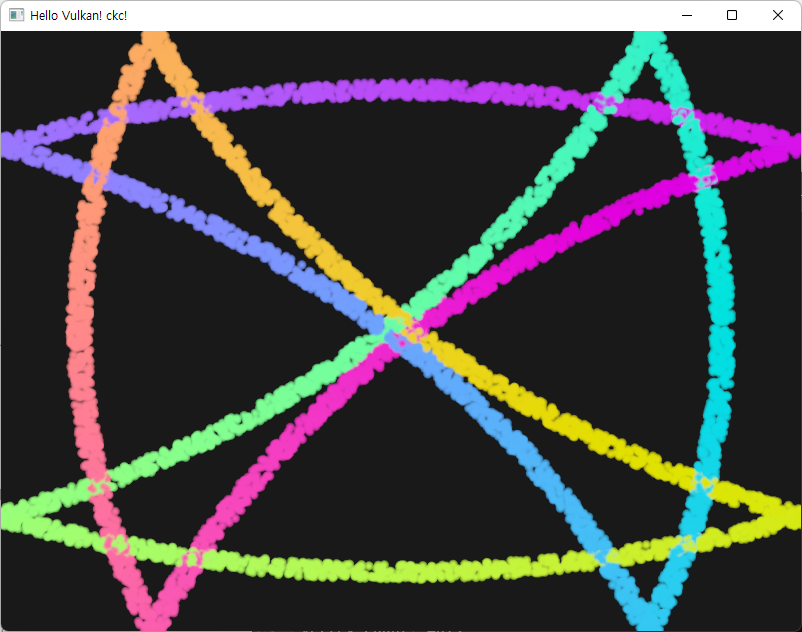
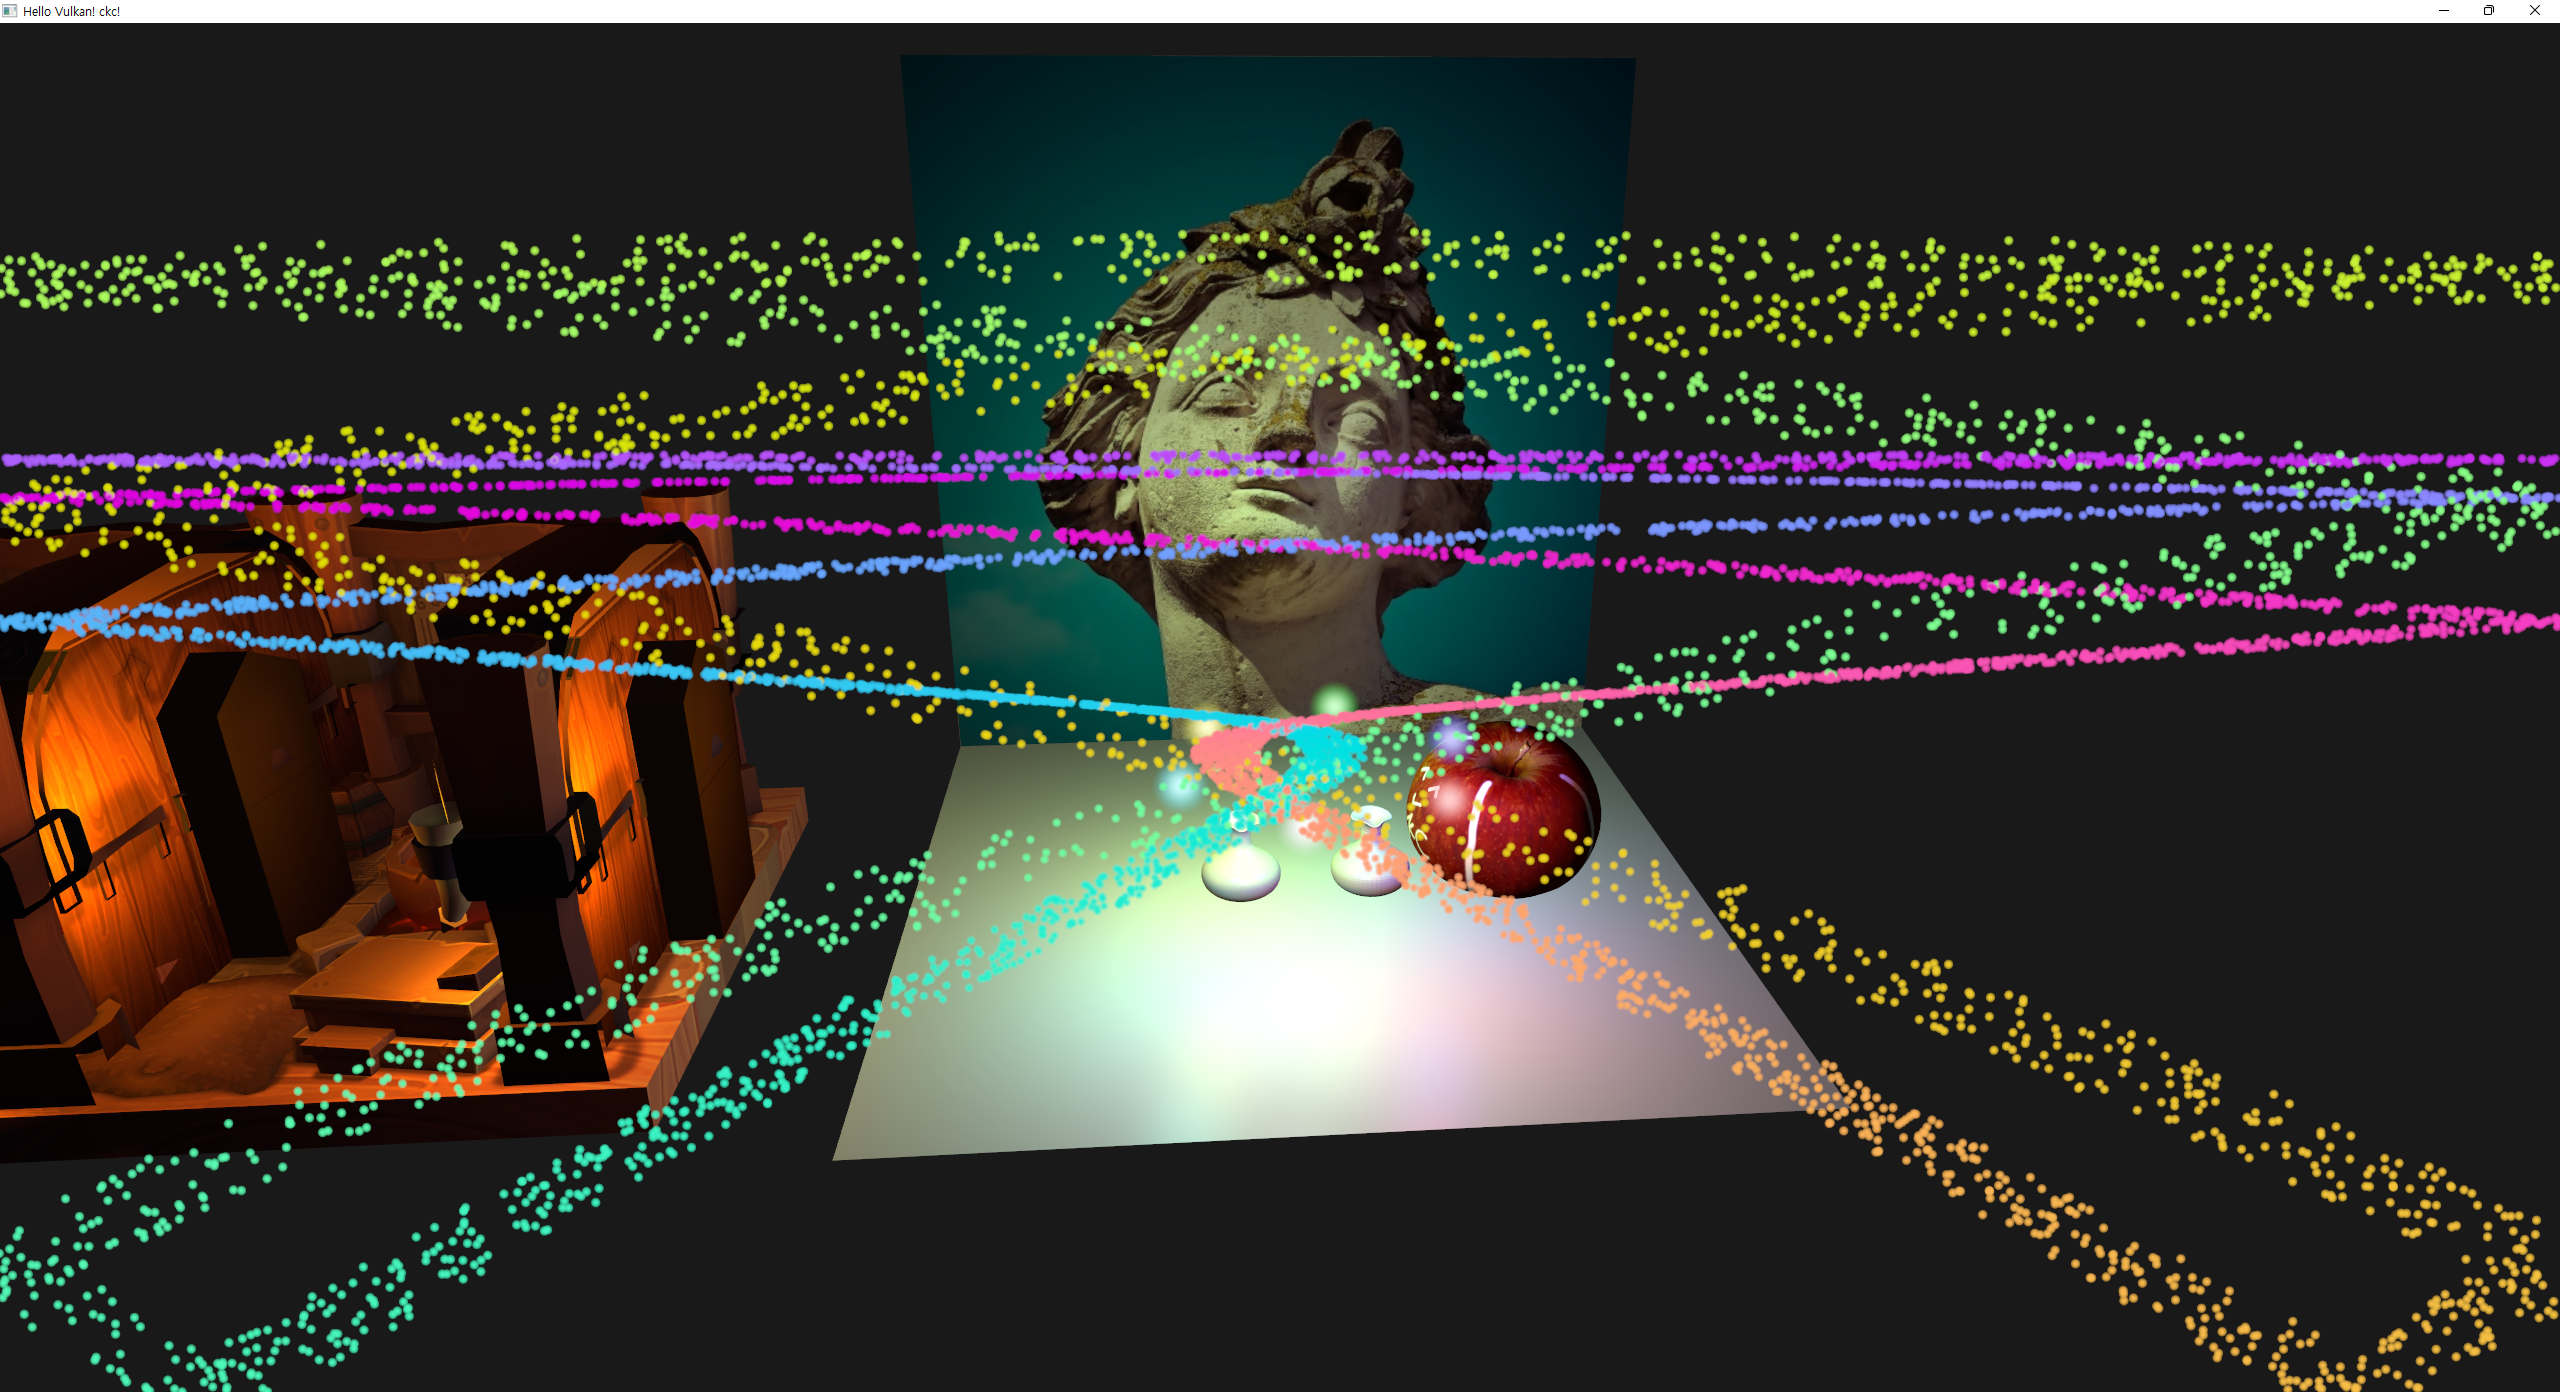
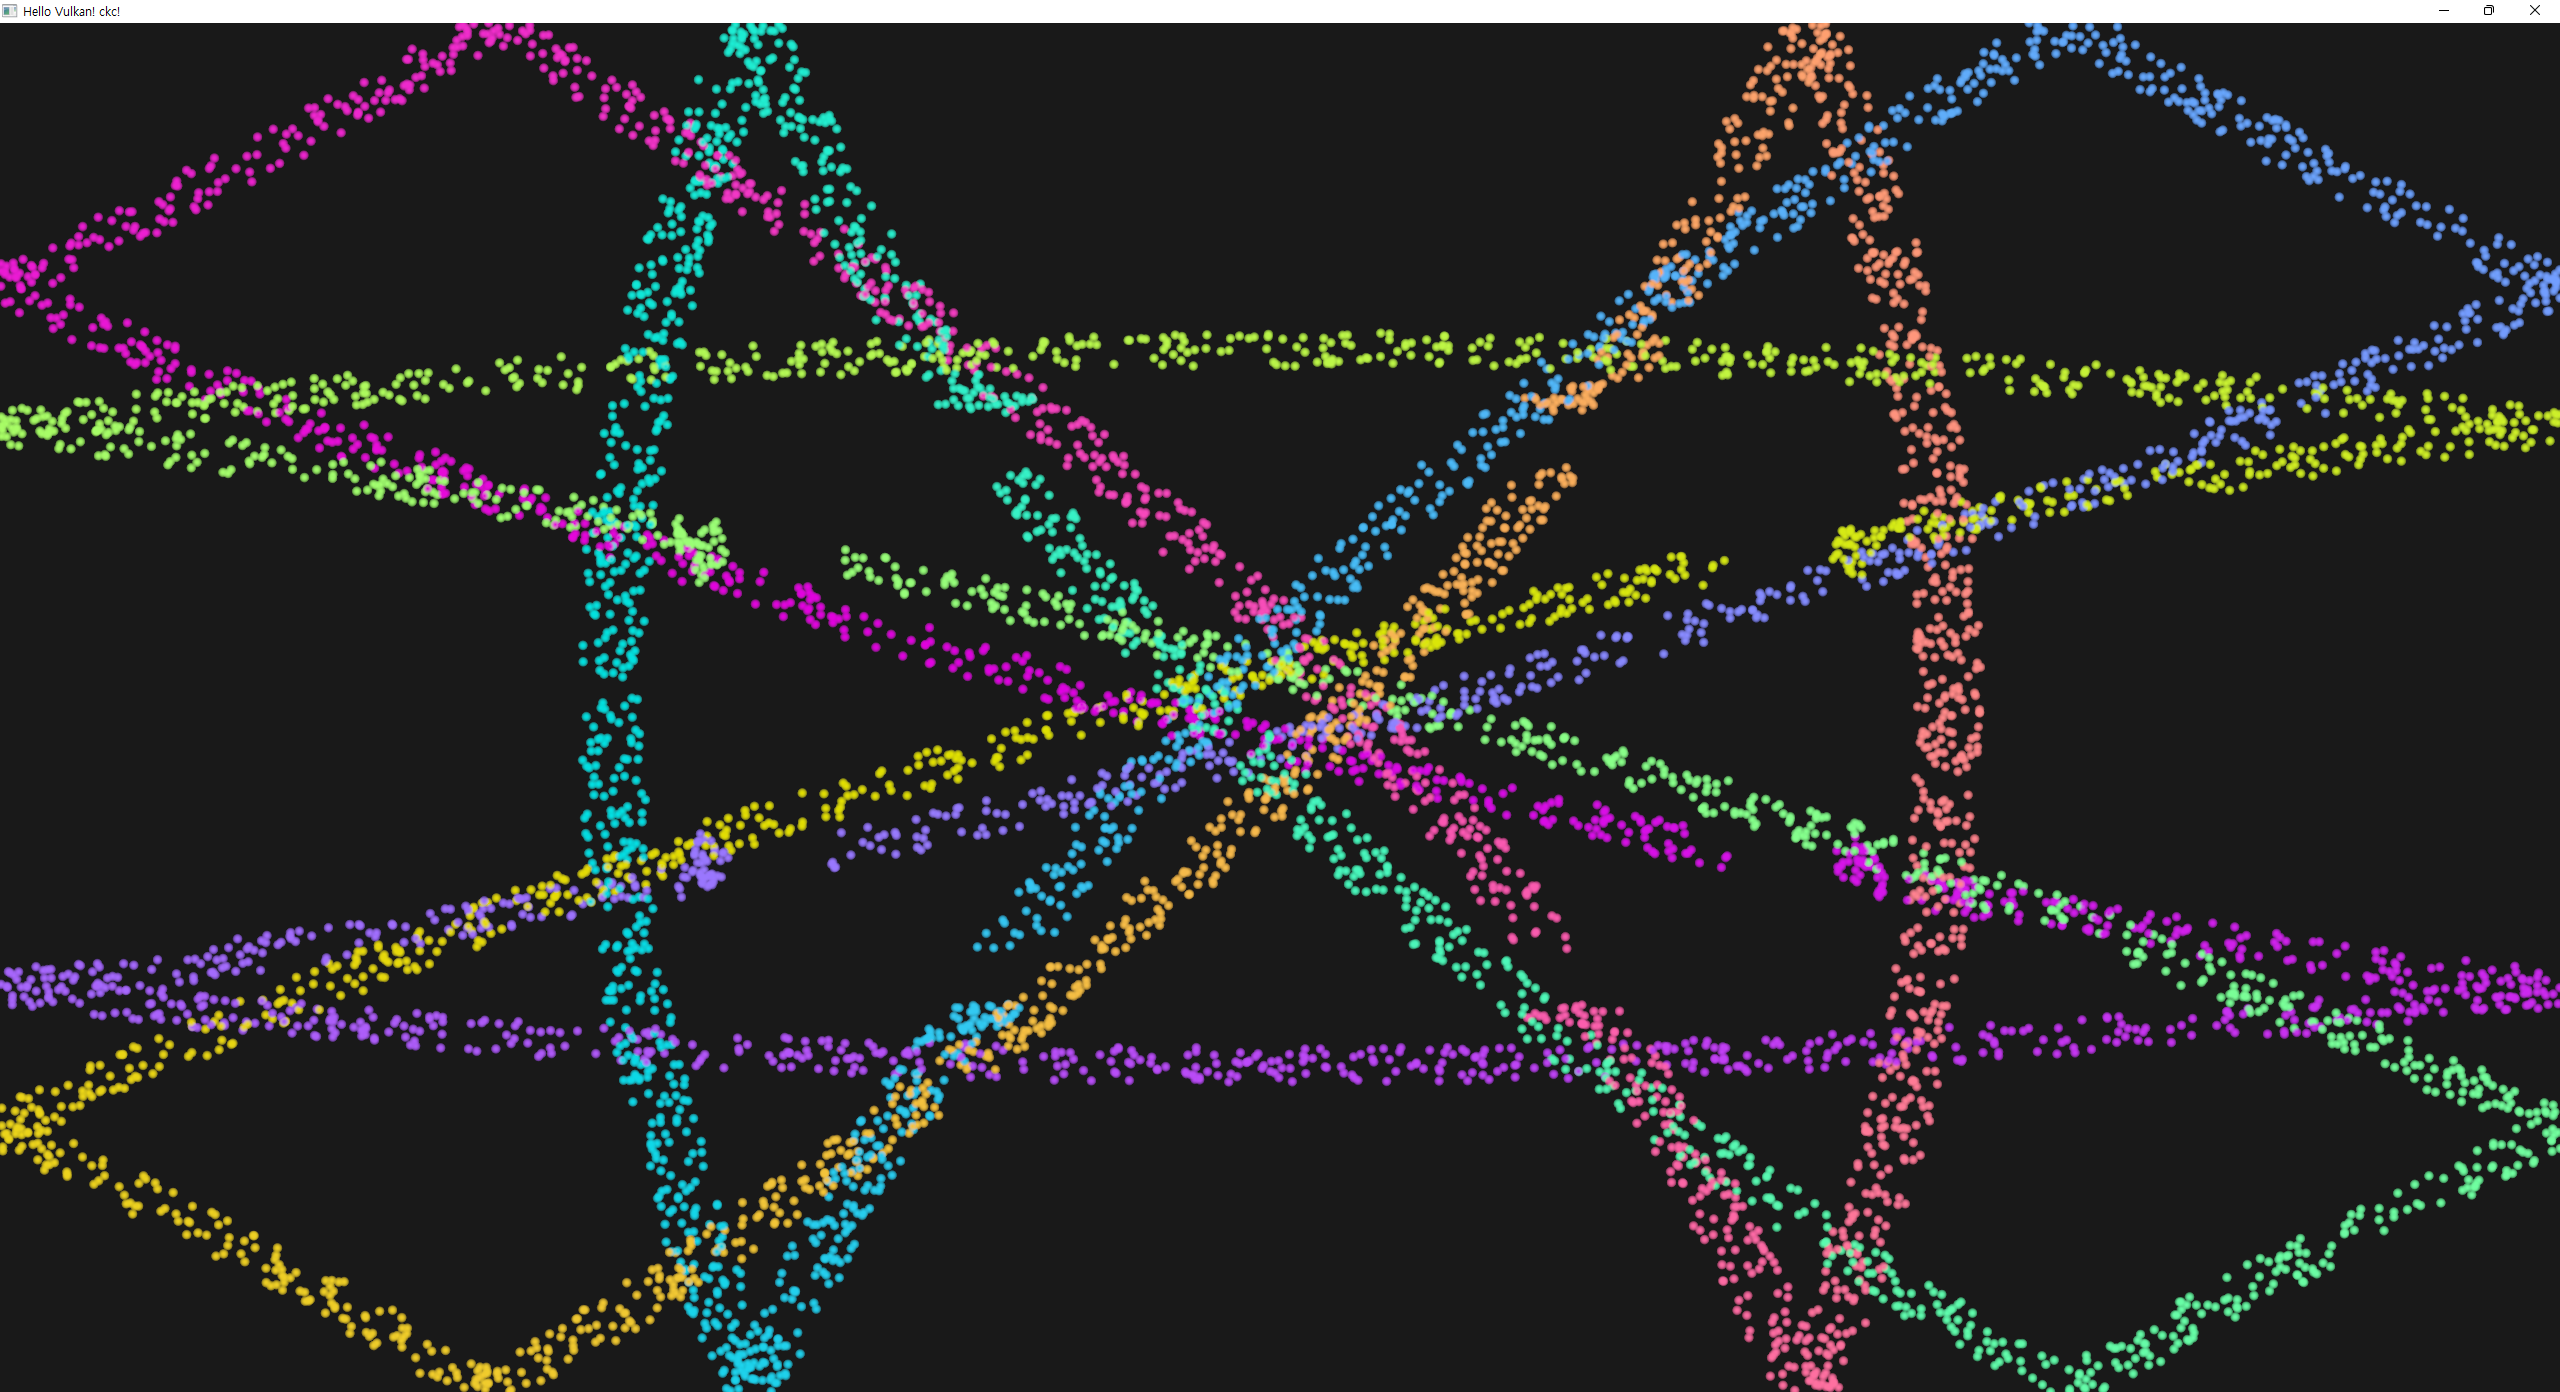
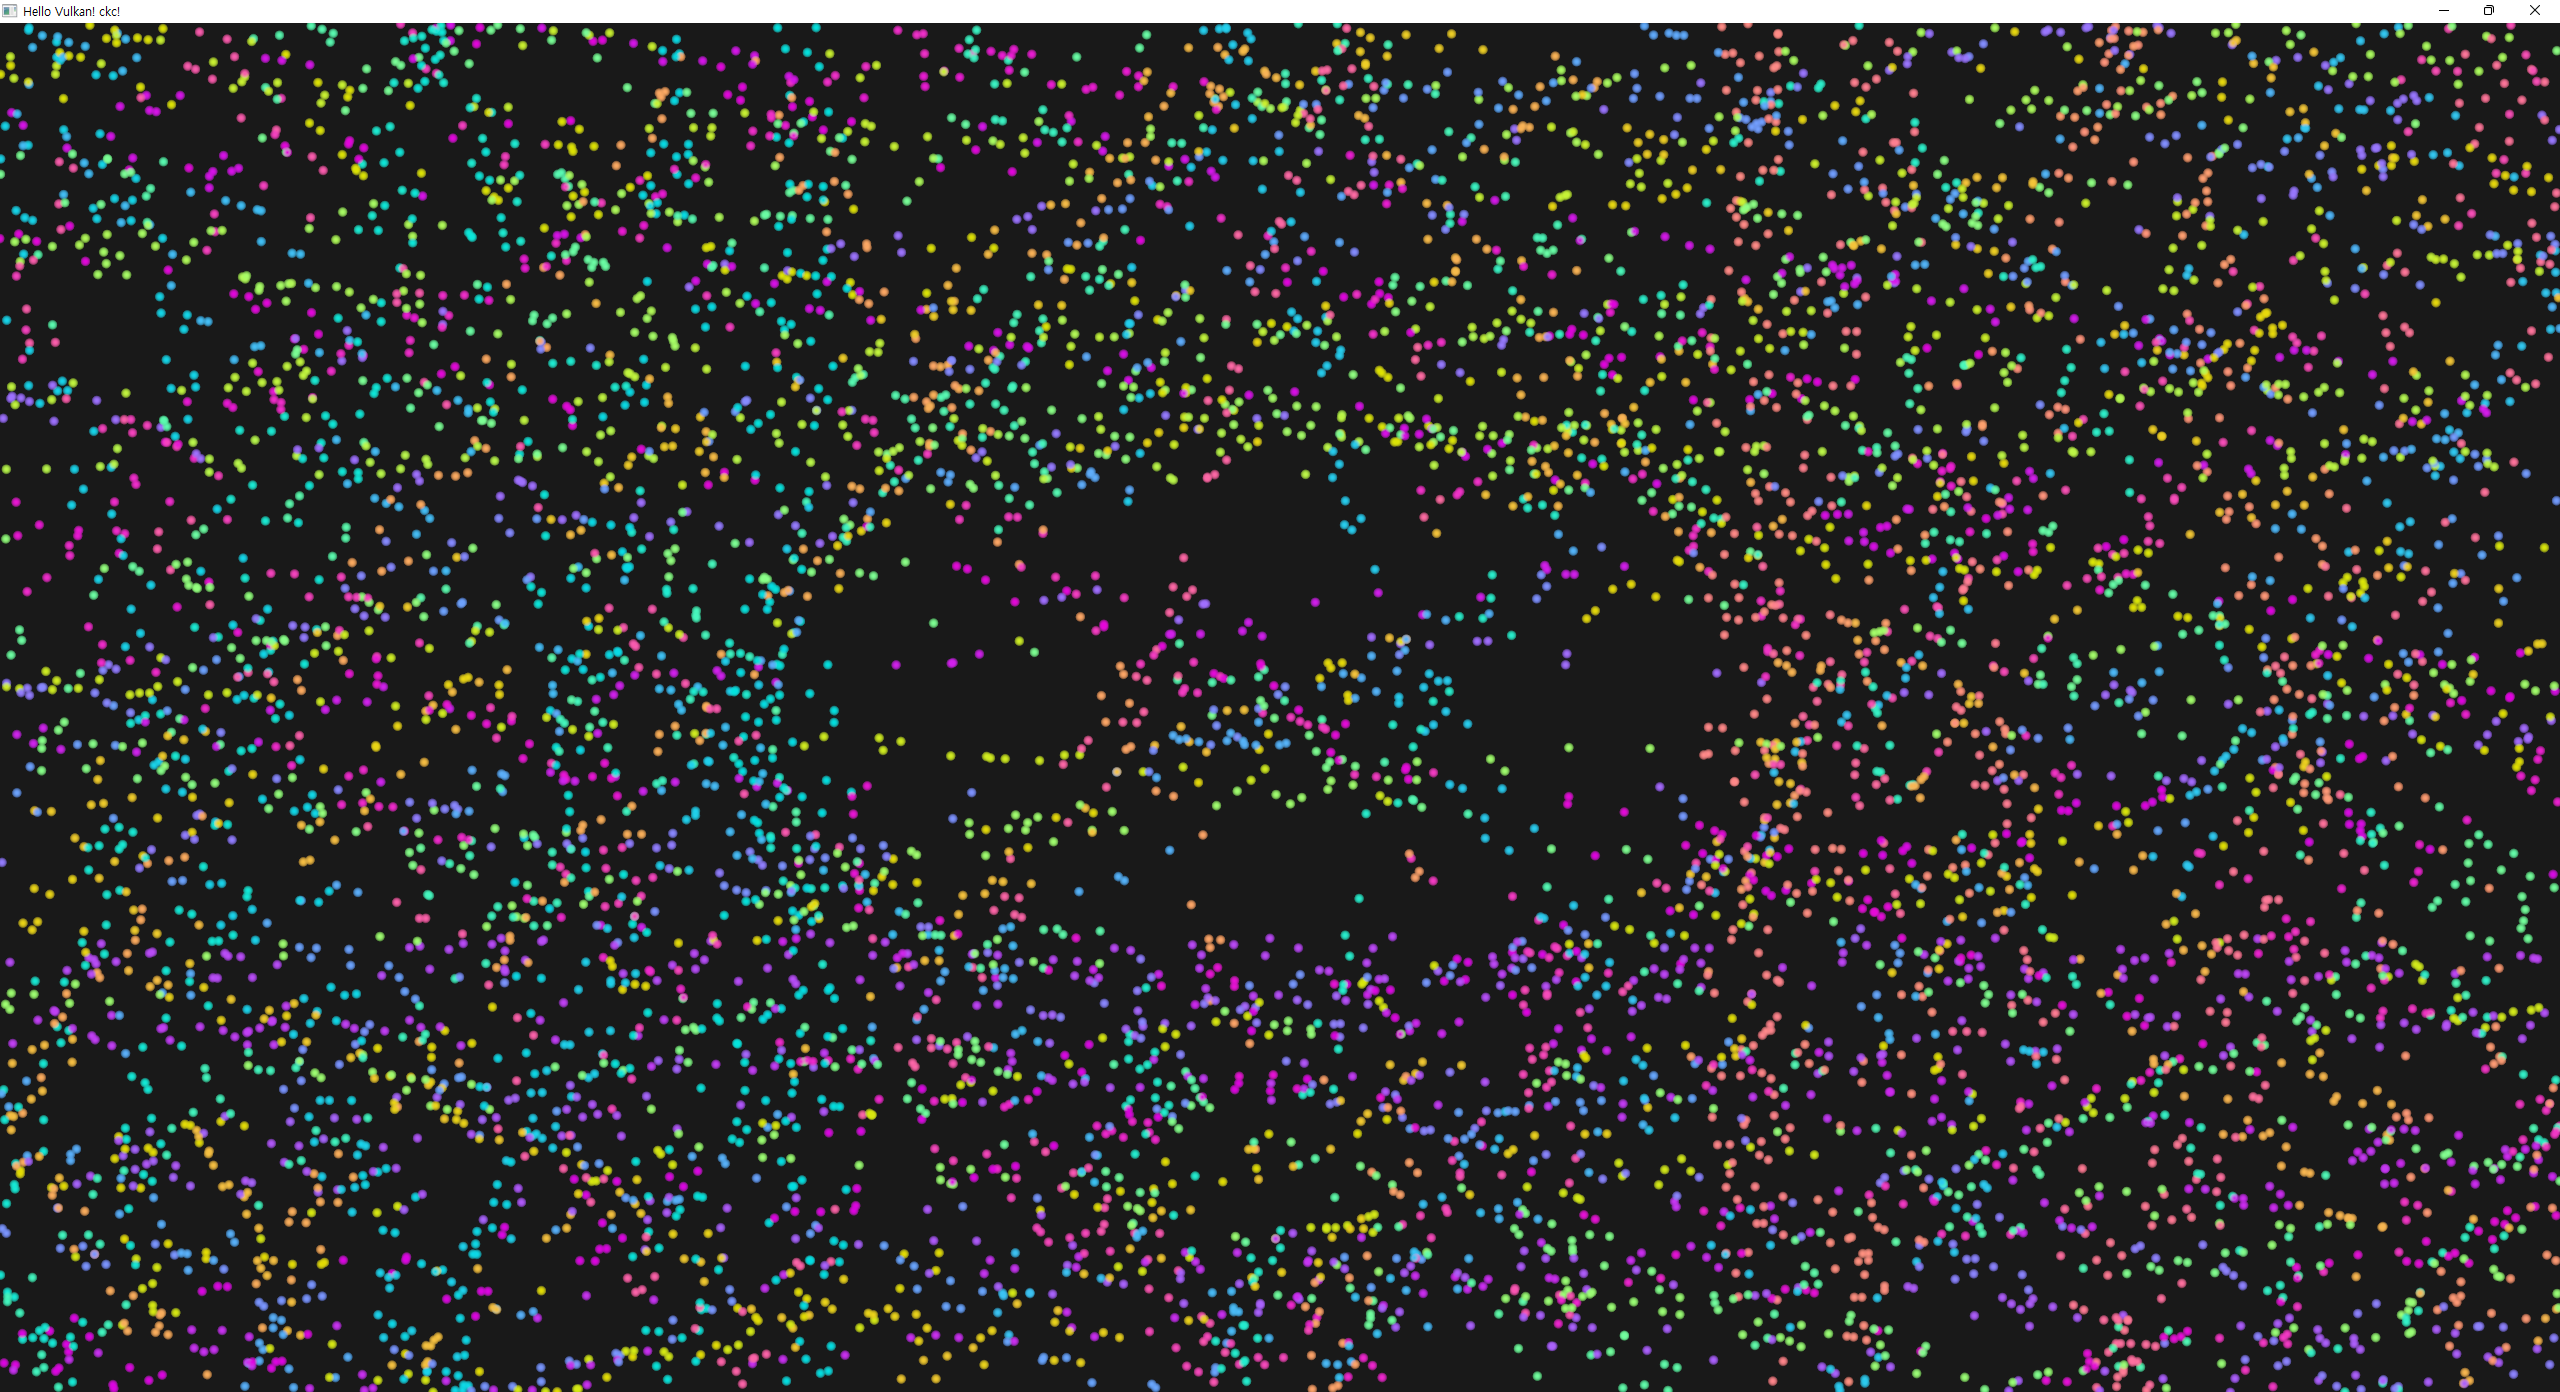
| without gravity | with gravity |
|---|---|
 |
 |
 |
 |
 |
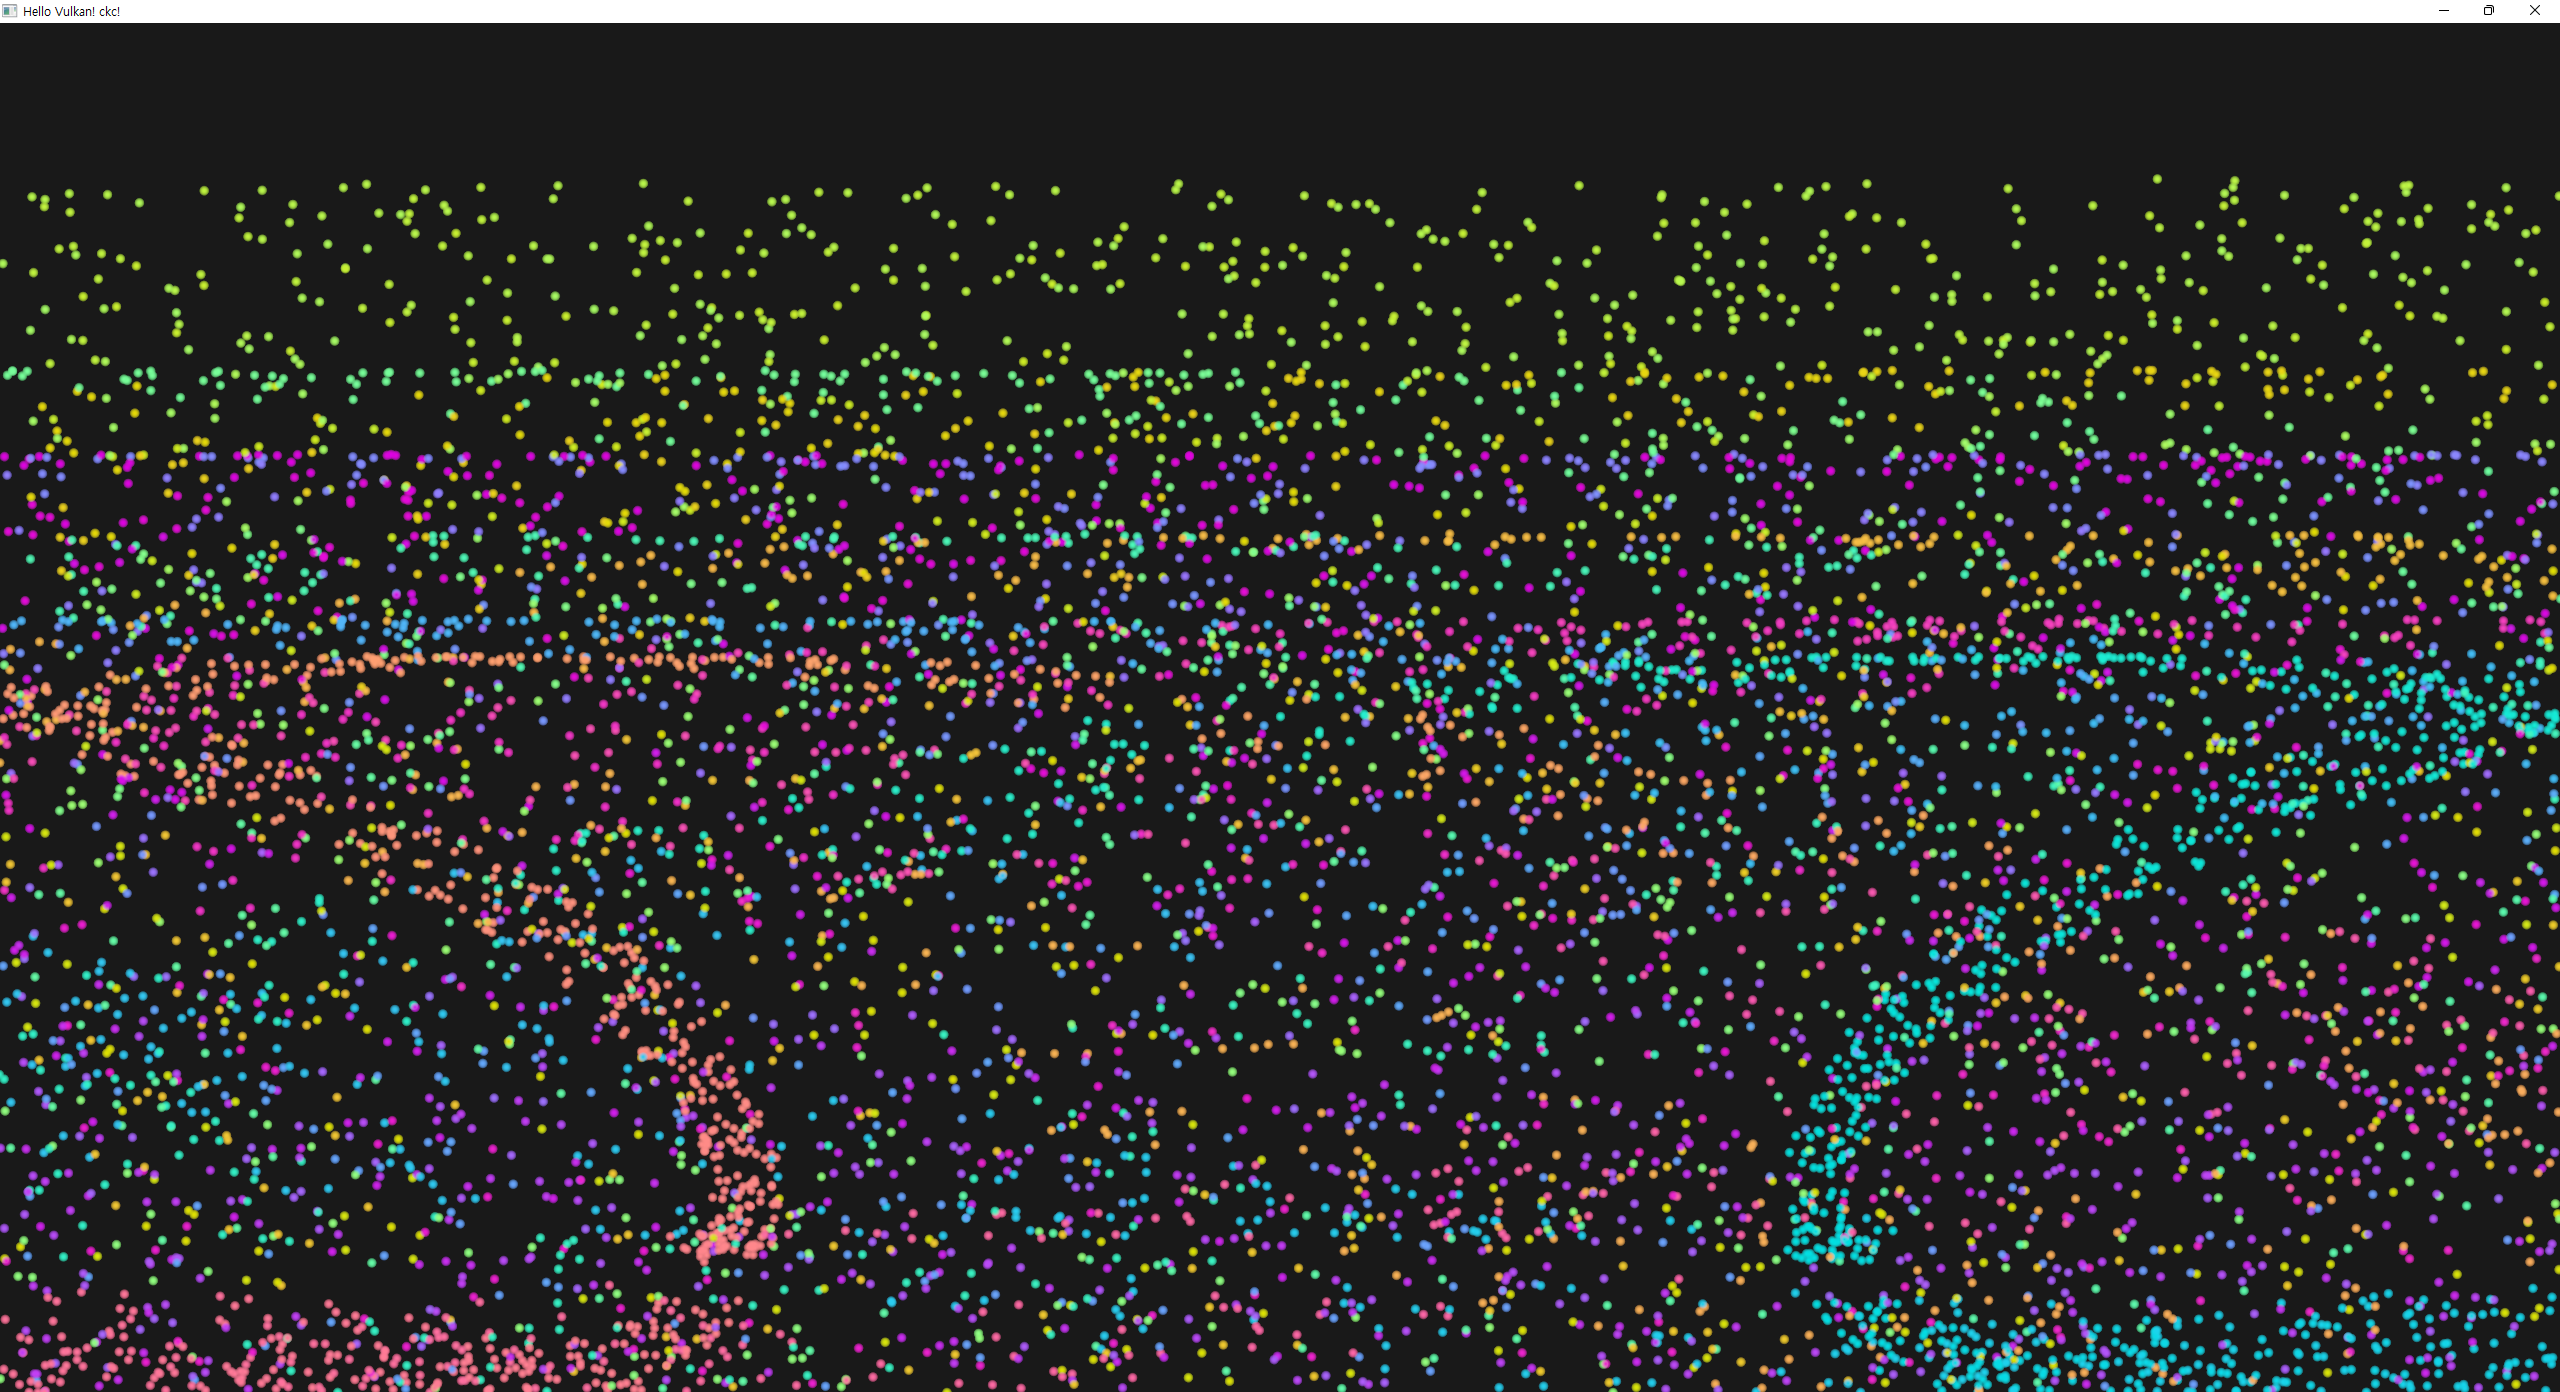 |
 |
|
 |
 |
변경 내용 PR
https://github.com/keechang-choi/Vulkan-Game-Engine-Tutorial/tree/study-compute
추가 찾아본 자료들
- https://vkguide.dev/docs/extra-chapter/abstracting_descriptors/
- https://blog.hybrid3d.dev/2020-12-21-reason-for-slow-of-if-statement-in-shader#fn:1
data manipulation
여러 buffer타입을 다뤘다.
- vertex/index로 primitives를 전달
- uniform으로 data를 shader로 전달
- 이미지 써서 texture mapping
지금까지의 내용들은 data를 cpu에서 썼던 것들을 GPU에서 읽는 작업만 수행했음.
compute shader에서 중요한 것은 buffer에 읽는 것 뿐만 아니라 쓰는것이기에, storge type의 새로운 buffer type을 다뤄야 함.
SSBO - shader storage buffer objects
SSBO를 통해 sahder가 buffer에 쓰는 것을 가능케 해준다.
uniform buffer 쓰는 것과 유사한데, 차이는 다른 버퍼 타입을 ssbo로 alias할 수 있고(vertex buffer를 ssbo로도 쓸 수 있다), 크기가 커도 된다는 것.
compute shader에서 write하고, vertex shader에서 read도 하고, staging buffer를 통해 transfer도 해야하는데, buffer info에 이런 여러 usage를 지정해주면 된다.
처음 staging buffer를 통해 이 ssbo로 전달하고 나면 더이상 host에서 접근할 필요가 없으므로, GPU 메모리에만 머물도록 memory property를 device local로 지정해서 생성한다.
shader에서 해당 SSBO를 선언해주는데, 크기를 unbound로 선언해놓을 수 있는 장점이 있다. 그리고 memory layout qualifier를 지정해줘야하는데, 메모리에 어떻게 alignment 될지에 대한 형식이다. 여기서는 std140을 사용했는데, std430도 가능하다.
memory layout qualifier 관련 자료
- https://www.khronos.org/opengl/wiki/Interface_Block_(GLSL)
- https://github.com/KhronosGroup/GLSL/blob/master/extensions/khr/GL_KHR_vulkan_glsl.txt
compute queue families
튜토리얼 초반에 graphics queue family를 정했는데, vulkan에서는 graphics와 compute 연산이 둘다 가능한 queue family를 적어도 하나 지원하도록 강제해서 우리는 하나의 queue를 사용한다.
하지만 dedicated compute queue를 쓸수도 있고, 이는 async compute queue 방식에서 사용된다.
compute shader stage
compute shader 에서도 graphics 예시들에서와 비슷하게, compute stage pipeline을 쓴다. binding point가 graphcis와 compute 별도로 있는 것에 주의.
loading compute shaders
VK_SHADER_STAGE_COMPUTE_BIT 를 써서 compile 된 shader 코드를 loading 한다.
preparing the shader storage buffers
GPU로 초기데이터를 전송한다. 그리고 frames-in-flight 수 만큼 준비해서 utilization을 높인다.
SSBO를 생성한 후 이에 맞게 resize하고, staging buffer를 사용해서 transfer 한다.
staging buffer는 transfer-src의 usage와, host-visible, host-coherent memory property를 써서 생성한다.
descriptors
거의 graphics 부분과 동일하다. stage flag로 VK_SHADER_STAGE_COMPUTE_BIT 를 주는 것이 차이다. vertex shader 에서도 쓰고 싶으면 stage flag를 combine하면 된다.
SSBO도 마찬가지로 command 에서 접근하기 위해서는 bind를 먼저 해줘야 한다. 여기서 주의할 점으로, 우리는 한 frame을 계산하기 위해서는 이전 frame의 결과를 읽어야 하므로, descriptor set에 이 정보를 추가한 두개의 SSBO를 담아야 한다. 우리는 하나의 descriptor set에 binding으로 추가하는 방식으로 구현한다.
uniform buffer와 ssbo 두개를 포함한 총 3개의 binding을 사용하는 descriptor set 한개를 생성하고 write 해줘야 한다. 이에 맞는 descriptor pool size도 frames-in-flight 수를 고려하여 정해줘야 한다.
compute pipelines
compute 단계는 graphics pipeline의 일부가 아니므로, 새로운 pipeline 생성이 필요하다. rasterization stage가 없어서 설정할 것이 많지 않고 간단하다.
compute space
어떻게 compute workloads가 GPU의 3dim에서 처리되는지에 대한 두가지 개념이 있다.
- work group
- gpu의 compute hardware에서 어떻게 wkrloads가 형성되고 처리되는지.
- work group의 dimension은 dispatch command를 사용할 때 결정된다.
-
vkCmdDispatch에서 dim이 정의된다.
- invocation
- 그리고 각 그룹은 invocation의 묶음이다.
- invocation들은 잠재적으로 병렬로 실행되고, 각 차원은 compute shader에 설정된다.
- 한 work group 안의 invocation 들은 shadred momory에 대한 접근을 가진다.
- compute shader의 local size에서 dimension이 정의된다.
-
maxComputeWorkGroupCount,maxComputeWorkGroupInvocations,maxComputeWorkGroupSize등의 값이 device마다 다르므로 항상 확인하고 compute shader를 사용해야 한다. VkPhysicalDeviceLimits
GPU architecture
GPU 구조에 관한 배경이 없이는 이해하기 힘든 내용들이라 판단되어 추가로 찾아본 내용들이다.
- compute shader 와 work group
- https://stackoverflow.com/questions/54750009/compute-shader-and-workgroup
-
여러 api에서 유사한 계층의 grid subdivision of work 개념이 있다.
vulkan 에서는 invocation(thread) -> subgroup -> local work group -> global work group의 계층이 있고, subgroup은 더 복잡한 개념이라 우선 넘어가는게 편하다.
shader 에서 설정한 local_size는 a local workgroup에서의 각 invoation의 dim을 결정하고,vkCmdDispatch에서 정하는 dim이 global workgroup에서의 local workgroup의 dim을 결정한다.
그래서 dispatch(M,N,P) 하고 layout(X,Y,Z)이면 vulkan이 MNP개의 local work group들을 실행시킬거로, 각각은 XYZ 번의 invocation of shader로 구성된다. - GPU programming 개념
- https://enccs.github.io/gpu-programming/4-gpu-concepts/#gpu-execution-model
-
parallelism
- computing
- distributed vs. shared-memory
- 분산 환경은 process based vs. 공유메모리는 thread based.
- message exchange vs. serial + parallel region.
- computing
-
실행 모델
- CPU
- low latency, low throughput
- heavy cachine과 branch prediction을 통해 달성
- GPU
- high latency, high throughput
- 개별 thread는 cpu보다 훨씬 가벼워서, context switching의 penalty가 적다. 그래서 어떤 threads는 메모리 관련 연산을 하면서, 다른 threads는 다른 명령들을 실행하는 형태가 가능.
- thread
- 내부적으로 index를 가져서 계산과 접근에 사용되는 구조다.
- global gpu memory에 접근 가능하지만, 다른 threads에서 변경된 내용은 kernel을나눠서 update 된 후 사용해야 한다.
- threads들은 warp라는 group으로 묶인다.
- gpu memory 접근은 특정 사이즈 단위로 묶이고, 같은 warp에 있는 threads들은 memory에서 인접한 데이터에 접근해야 한다. coalesced memory access
- 한 warp에서는 같은 명령을 실행하게 해서 성능을 높이는데, 만약 if branch등이 있어서 한 warp내부에서 다른 path를 실행해야 한다면, 두 branch를 sequential하게 두번 실행하게 된다. 이걸 lock-step 실행이라고 하는데, 그래서 이 warp divergence 비용을 줄이려고 lock-step 실행이 없는 구조도 있음
- 그 위의 계층: block. 각 block은 하나의 SM(Streaming Multiprocessor) 단위에 배정됨. 각 SM(or SMP)는 하나이상의 SIMT 단위를 포함하고, 스케쥴러와 매우 빠른 on-chip memory(shared memory)를 가짐.
- CPU
- GPU 메모리 모델
- Khronos Blog - The Khronos Group Inc
- [GPGPU Series 3] GPU Architecture Overview – MKBlog
-
[NVIDIA] GPU Architecture (tistory.com)
- SM안에 여러 SIMT unit이 있고
- 그 SIMT UNIT 안에는 SP(Streaming Processor)가 여러개, warp scheduler, register 등이 위치함.
- SM안에는 shared memory도 있고, L1 cache도 있음.
- 이런 SM에 여러개 모인걸 하나의 gpu cluster라고 보면 됨.
- L2 cache에 해당하는 cache는 gpu memory partition에 DRAM과 함께 위치하는 구조.
- SM안에 여러 SIMT unit이 있고
-
Understanding GPU caches – RasterGrid
- 보통 GPU core라고 하면 SM과 같은 뜻임.
- 이 코어 안에는 여러개의 warp(wave) 들이 있다.
- 각 wave 안에는 여러 thread가 있다.
- 이 core/SM은 per core data cache를 가지는데 보통 CPU의 L1 cache에 해당한다고 보면 됨.
- shared memory도 가지는데, 이건 cache가 아니라 scratchpad memory의 일종으로 cache와 비슷한 역할을 하게 해준다.
- 보통 GPU core라고 하면 SM과 같은 뜻임.
- 용어 비교 및 정리
- compute-shader-101/docs/glossary.md at main · googlefonts/compute-shader-101 (github.com)
- thread => invocation / work-item
- warp => sub-group / wave
- block => work-group
compute shaders
shader input
- binding 0 => UBO
- binding 1 => last frame particle SSBO
- binding 2 => current frame particle SSBO
- invocation dimenstions
-
gl_GlobalInvocationID이 invocation across current dispatch인데, 이 값을 particle array의 index로 쓸 것임.
-
rungging compute commands
dispatch
work group dim을 [particle count / 256, 1, 1] 로 지정해준다.
그러면 한 work group의 compute shader는 256번의 invocation을 할 것이므로, 전체 particle에 대한 계산을 하게 된다.
pipeline 생성때와 마찬가지로, render pass나 viewport 등의 설정이 필요없어서 더 간단하다.
submitting work
먼저 compute queue에 제출해서 particle position을 update한 후, graphics queue에 submit 한다.
synchronizing graphics and compute
write가 끝나기전에 read 하면 read-after-write hazard가 있을 수 있다.
혹은 read 하고 있을때 update를 하면 write-after-read hazard가 발생한다.
그래서 두 queue 사이의 synch가 필요한데, 이는 semaphore와 fence를 통해 달성할 것이다. 왜냐하면 submit 은 순서대로 하더라도 끝나는 순서는 보장되지 않기 때문.
computeInFlightFences와 computeFinishedSemaphores를 추가하는데 graphics와 마찬가지로 fence는 signaled state로 시작한다.
이 tutorial code 에서 synch 순서를 요약하면 다음과 같다.
- wait
computeInFlightFences - update UBO(시간 등 정보는 compute shader에서도 필요하다)
- reset
computeInFlightFences - record compute command buffer
- submit to compute queue
- sema
- signal:
computeFinishedSemaphores
- signal:
- fence:
computeInFlightFences
- sema
- 기존 graphics Fence wait.
inFlightFences - acquire next image
- record draw
- reset Fence.
inFlightFences - submit to graphics queue
- sema
- wait:
computeFinishedSemaphoresimageAvailableSemaphores
- signal:
renderFinishedSemaphores
- fence:
inFlightFences
- wait:
- sema
- submit to present queue
- sema
- wait:
renderFinishedSemaphores
- wait:
- sema
Q. compute queue submit에 wait가 없어도 괜찮은 이유:
wait fence로 그 frame에서 compute command buffer의 사용이 끝난 다음 recording -> submission 하도록 강제하고 있어서.
Q. graphics queue submit에 wait가 필요한 이유:
- compute buffer가 업데이트 되고 있을때는 vertices ssbo를 읽으면 안됨. (이를 위한
computeFinishedSemaphores) 이때 wait stage는VK_PIPELINE_STAGE_VERTEX_INPUT_BIT- 기존 present engine에서 acquire next image를 통해 present가 끝났는지를 fragment shader가 color attachment에 output하기 전에 확인하는 절차는 여전히 필요. (이를 위한
imageAvailableSemaphores) 이때 wait stage는VK_PIPELINE_STAGE_COLOR_ATTACHMENT_OUTPUT_BIT
drawing the particle system
shader storage buffer를 생성할 때 여러 usage를 가지도록 설정했었는데, drawing의 vertex buffer로도 사용가능해서 바로 draw가 가능함.
conclusion
compute shader 관련 추가 topic
- shared memory
- asynchronous compute
- atomic operations
- subgroups
additional readings
따로 내용을 정리하지는 않으려 한다.
Youtube video - Introduction to Vulkan Compute Shaders
Introduction to Vulkan Compute Shaders - YouTube
말미에 현실을 그대로 복제하는 것만이 graphics의 목표는 아니라고 하면서 다음 인용구를 남겼는데 인상적이었다.
We do computer graphics because we want to convey our dreams to other people.
Ken Perlin
Blog - GPU/GPGPU series MKBlog
마무리
Vulkan tutorial에 관한 내용을 모두 마쳤다. tutorial 수준에서 넘어간 부분도 많고 간소화 시켜서 핵심만 이해한 내용들도 많아서 앞으로 중복되는 내용이 나올때 마다 조금씩 더 깊게 살펴보는 방향으로 공부하면 좋을 것 같다.
향후 계획에 대해서, 이 Vulkan Game Engine lecture로 시작한 repo를 마무리 하고, 예제 구현 중심의 repo를 새로 작성하려 한다. 이유는 더이상 Game engine의 구조를 따라갈 이유도 없고, (해당 lecture도 추가되는 내용이 없는데 새로운 내용이 추가되면 반영해도 좋을 것 같다.) 마지막 compute shader 구현 부분에서 봤듯이, 기존 내용에 새로운 내용을 얹어가는 구현에 비효율이 크게 느껴졌기 때문이다. 앞으로는 각기 다른 주제의 예제를 작성할 때 공통 interface를 활용해서 핵심이 되는 부분만 빠르게 작성할 수 있는 구조의 repo를 관리하고자 한다.
New Vulkan example repo for studying
https://github.com/keechang-choi/Vulkan-Graphics-Example
새로운 레포에 대한 생각은 SaschaWillems의 repo를 보면서 들게 됐는데(직접 실행해보면 흥미로운 예제들이 많다.), 다양한 vulkan 활용 예제를 담고 있다. 처음에 이 repo의 fork를 떠서 수정할까 싶었는데, 그러면 기존 구현된 내용들을 너무 싶게 이용하면서 공부의 효과가 떨어질 것 같아 구조를 모방한 새로운 repo를 0부터 시작하기로 했다.
그렇다고 똑같은 코드를 따라쓰기 하는 것 역시 의미가 없다고 생각해서, 조금 변형한 구조와 예제 내용을 중심으로 예제를 하나씩 추가할 계획이다. 특히 레포 구조가 여러 cross platform을 지원하기 위해서 깔끔하지 않은 부분도 있고, c-api와 c-style 코드가 많아서 관리하기 깔끔한 구조는 아니라고 생각했다. 그래서 필요한 수정들은 적극적으로 구조 변경을 할 생각이며, 필요한 third-party 활용도 적극적으로 할 생각이다.
정해둔 변경은 vulak-c++ api 활용, VMA 메모리 allocation 활용이다.
- KhronosGroup/Vulkan-Hpp: Open-Source Vulkan C++ API (github.com)
- GPUOpen - VulkanMemoryAllocator (github.com)
구현 주제와 순서 계획은 대략 다음과 같고, 하나씩 추가할때마다 포스트를 작성할 계획이다.
- triangle rendering
- pipelines and model loading
- animation and skinning
- particle compute system
- position-based-simulation on compute shader
- cloth?
- other physics simulation